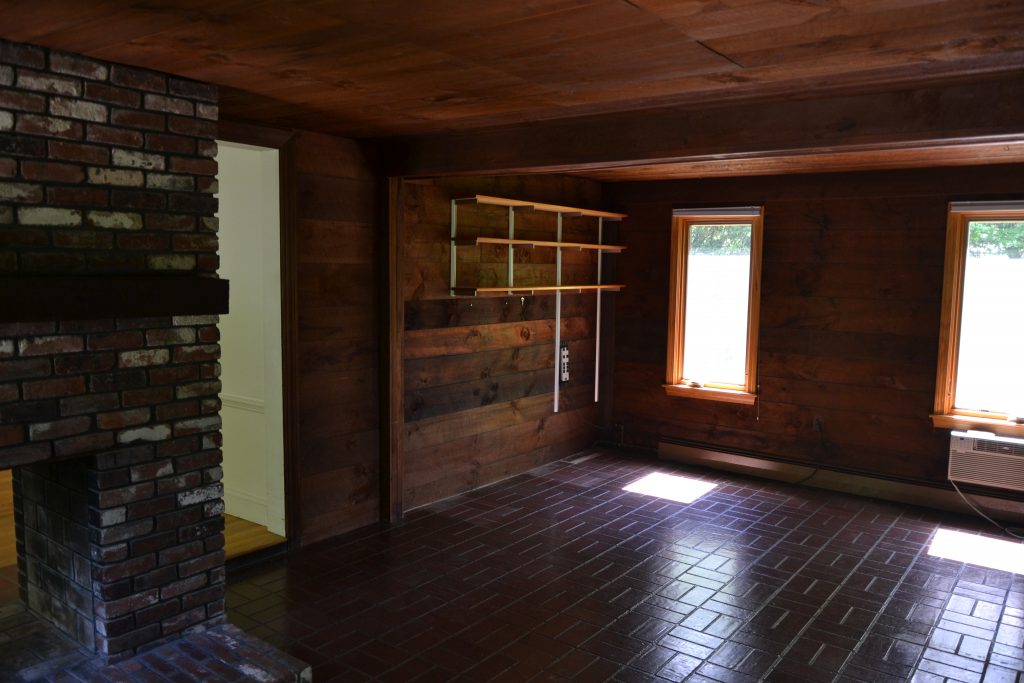
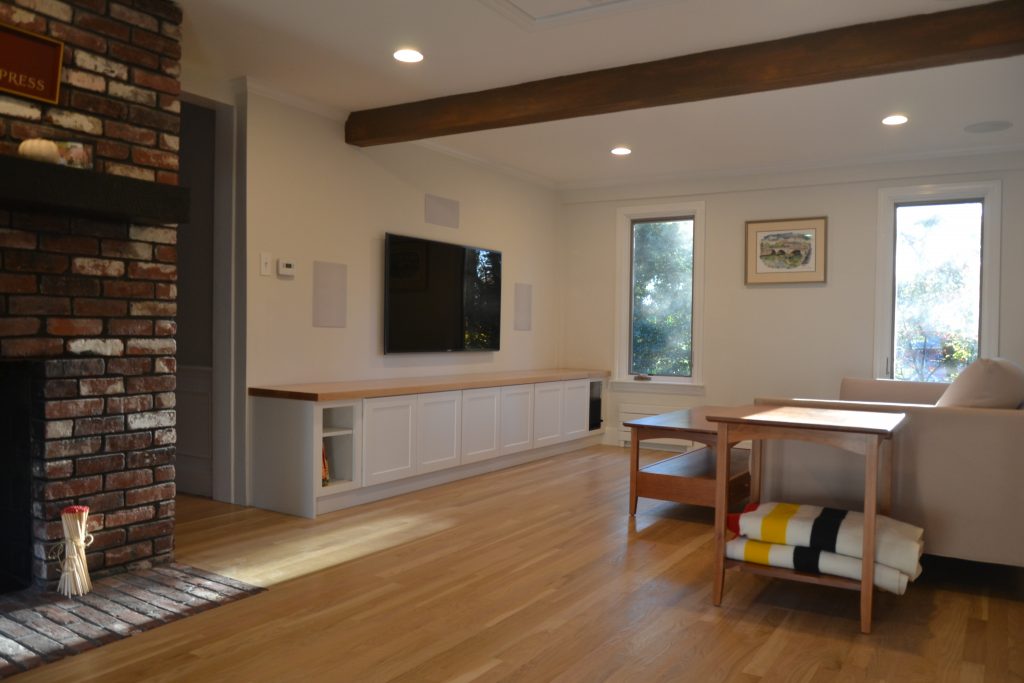
It’s been a long time coming. What began in the summer of 2016 as the first (major) project in our new home is finally complete. Log cabin turned modern living. Dirty cave turned home theater. Whatever you call it, it’s our most prominent change to date.
We began with the floor. The faux brick vinyl had to go. Our nephew to the rescue! Our little helper had a blast chucking tiles out the window. When all was said and done, what do you know? The tiles had been adhered directly to the concrete roof of the garage below. After countless weeks of research – and even further months of manufacturer negotiations – our floating subfloor and high compressive strength insulation by Amvic was delivered. Not only would our new living room stay warm, the additional thickness would allow the floor to become level with the adjacent dining room floor.
Now that we had insulation, we had to get rid of that awful baseboard heating! We hired plumbers to install a new loop under the subfloor, ready to receive Runtal radiators after the flooring was installed.
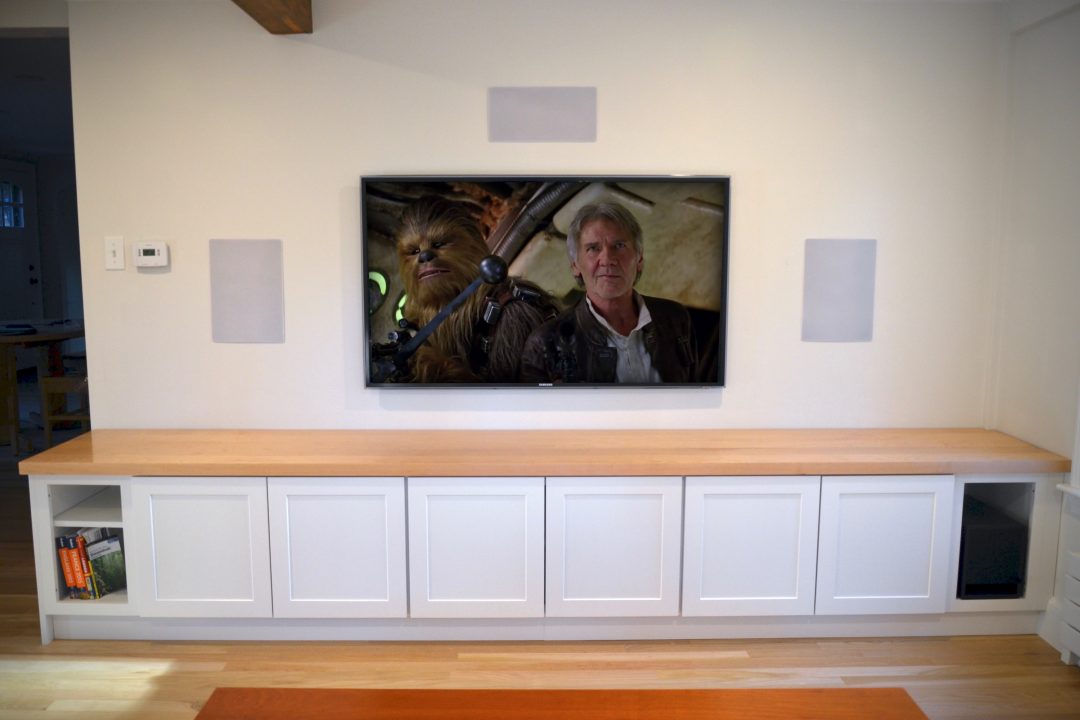
Next up: those walls. Cheap, dark, and interconnected, these things were more hassle to remove than anticipated. You’d think the rest would be easy. Not so fast! It was time to start working on our pièce de résistance: the home theater. In order to simultaneously hide an unseemly column and create a larger canvas, we decided to build a new stud wall: complete with speakers, CAT6 network cables to our future office next door, and the latest HDMI tech built right in. (The TV and speaker placement has been purposely designed for future upgrades!) Rich set to work installing our new 5.1 surround sound setup. You can see our low-voltage underpinnings below. We brought in professionals for the power outlets and recessed lightning.
Why stop with simply insulating the floor? Before bringing in someone else to drywall – ceilings can be hard! – we filled our new interior wall with soundproofing insulation, but that’s not all. Everywhere else, we went with open cell spray foam. The team at Mass Energy Lab filled our walls and previously uninsulated attic and their work was fantastic. Thanks, Mo!
This past spring, we were ready to install the beautiful white oak floors you see today. Unfortunately, this was prime study time for Hannah, who later found out it was worth it – she passed her Professional Engineering exam! Parents to the rescue! After a weekend of installing the subfloor and another installing the hardwood, the room was looking nearly complete. To finish off the floor, we also hired the master of refinishing: Ed Griffith. Don’t do this yourself unless you are really confident or don’t mind wavy wood!
After the heating went in and the paint went on, it was time for the finishing touches. First, the base and crown moulding. Don’t feel bad if you have to watch the “How To Cope” YouTube a few times – we probably watched it fifty! We designed a semi-custom cabinet unit at our local Kitchen Views to span the entire length of our 127 inch theater wall. Hannah’s father helped with designing and installing the custom base as we used upper kitchen cabinets to keep the television as low as possible. To top it all off, a piece of maple plank, delivered by our favorite wood supplier, Baird Brothers. In that delivery came another piece of wood, but that’s for another time. We think it came out pretty nice if we do say so ourselves!


No Comments